http://www.keeyees.com/a/Products/Industrial_Scientific/60.html
Windows 10 computer
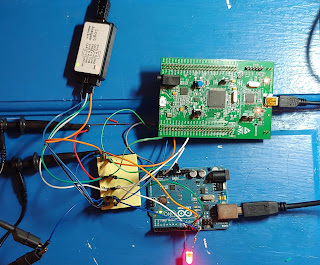
Male-to-Female jumper wires
In Windows Device Manager, it comes up:

Download and install Zadig to install USB drivers.
https://zadig.akeo.ie/
Open Zadig. Select unknown device (that’s your logic analyzer)

Install WinUSB(Microsoft) since I’m using a Win10 computer.

Doesn’t seem to let me rename the device. Oh well.
Download/Open PulseView - an open source signal analysis suite. It’s very cool.
https://sigrok.org/wiki/Downloads
Pull down “Connect to Device” and select ‘fx2lafw (generic driver for FX2 based LAs)’

Scan for devices.
The program detects a Saleae Logic Analyzer attached.
Seems like this product may be using the USB VID/PID from Saleae.
Saleae is a company that builds really nice logic analyzers, and very nice software as well if you’re looking for a logic analyzer with some more features and functionality. I haven’t used it personally, but I’ve taken online classes where it’s being used and it seems great. https://www.saleae.com/
Pressing on...

Click the Decoder Selector yellow/green icon left of 24MHz, Pick the protocol (I’m using SPI)

Rename the relevant signals (if desired) and click the SPI signal line. Assign the signals on the logic analyzer (LA) to the protocol signals

Bear in mind PulseView labels their Channels 0-7, my particular logic analyzer labels them CH1 - CH8, CLK and GND. So PulseView’s CH0 is my analyzer’s CH1. You can rename the channels in PulseView just by clicking on the channel and editing the ‘Name’ field.
**I’m not using the default CLK pin on the logic analyzer… not really sure what that does yet, actually. Connect one of the channels (CH1-CH8) as the clock signal and use that, and of course make sure you connect your grounds (and the LA ground) appropriately.
Set Samples to maybe 500M, and change the frequency to maybe 24MHz.
That gave me 21 seconds of sample time, and enough resolution to see the SPI transfers:

Voila! Setting up your $12 logic analyzer with open source PulseView.
Have some advice on settings and configurations? Something to share? Drop it in the comments!
No comments:
Post a Comment