STM32CubeIDE is a combo IDE of CubeMX and a stadard development environment with debugging tools.
1. Register for the ST site. It's required if you want to download basically anything. Keep yourself logged in.
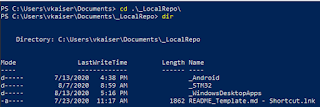
3. I recommend that you have a folder on your PC to act as a local repo for anything you push up to Git - but the IDE also requires a Workspace. I find the local repo doubles for that workspace, and I can create multiple workspaces in/out/around that folder.
Choose that for your workspace.
4. New STM32 Project:
Select the board/MCU you are using to acquire the necessary (desirable) initialization code and drivers for your selected hardware.
5. Next will take some time to generate those files.
6. Project configuration: Name it.
Selecting SMT32Cube will bring you to the graphical pin-configuration tool. It also means that you are restricted as to where you can place your code so it doesn't get overwritten by the CUBE tool.
5. Finish will generate a code base.
6. Build the project to ensure it compiles and setup is valid

Does the console throw any warnings?
Did you get an "FPU" warning?
Set the Floating-point unit settings to "None"

7. Try the code out on your board.

8a. Create a debug profile
Some MCUs support Serial Wire Viewer (SWV), and some don't. Namely, the 4 M0s do not. If your MCU/Board/Debugger does, you should enable the SWV here. If yours doesn't, you will have to use openOCD and SemiHosting to see 'printf' statements.
8b. In the debugger settings, select "OpenOCD"
Go to Startup, and in the 'Run Commands" type:
Apply and close.
Right click on the project ->Properties
In your code, make sure you include
Lastly, to use semihosting you must exclude syscalls.c from the build.
Right click on syscalls.c -> Properties
Apply & close.
Now when you run Debug:
and when you press "Run"
Useful? Tips? Drop it in the comments.


